Introduction
Before diving into the technicals, this step might cause some disagreements. There are strong preferences around which DNS or ad-blocker to use. The current popular choices are Adguard, PiHole, Unbound, and DNSMasq. This guide series will revolve around Adguard and its integration into the larger solution.
If you choose to pursue a different solution, you taking it upon yourself to figure out how to make it work. Do not expect that any other product to slot in as an exact replacement.
Environment
For the sake of this guide, assume there are three cluster nodes with addressing such as:
node1 - 10.0.3.111
node2 - 10.0.3.112
node3 - 10.0.3.113
Performing actions as root
The ideal security model dictates that interactively operating as root is incorrect, and that operations should run as a user, using ‘sudo’ to elevate permissions where necessary. Unfortunately, almost everything that needs to be done here will require ‘sudo’, so it will be faster to just become root and run everything as root:
sudo su -
Perform the following steps on one node until instructed otherwise
Install Adguard
First, determine what the current Adguard version is that is available. Visit the following page and note the latest specific version. Do not use ‘latest’ or ‘stable’, always pull the most recent and most specific version (at the time of this writing, it was ‘v0.107.43’).
https://hub.docker.com/r/adguard/adguardhome/tags
With that information, execute the following to create the directory structure for building the new container (and replace any version reference if a newer one exists):
mkdir -p /mnt/vagabond/docker/_build/adguard/0.107.43
cd /mnt/vagabond/docker/_build/adguard/0.107.43
Create the ‘Dockerfile’ (and replace any version reference if a newer one exists):
cat << EOL > build.sh
#!/bin/bash
export DOCKER_SOURCE=adguard/adguardhome:v0.107.43
export DOCKER_REGISTRY=registry.home.digitaldann.net:8443/adguard:0.107.43
docker pull \${DOCKER_SOURCE}
docker tag \${DOCKER_SOURCE} \${DOCKER_REGISTRY}
docker image push \${DOCKER_REGISTRY}
docker image rm \${DOCKER_SOURCE}
docker image rm \${DOCKER_REGISTRY}
EOL
chmod u+x build.sh
Now publish it to the local registry (removing future dependency on the internet-based registry):
./build.sh
Create the Volume Mount Paths
mkdir -p /mnt/vagabond/docker/adguard/conf
mkdir -p /mnt/vagabond/docker/adguard/work
Create Nomad job file for Adguard
If you want to read the official documentation for the Nomad job file spec, here it is: https://developer.hashicorp.com/nomad/docs/job-specification/job
Create the directory structure for the Nomad jobs:
cd /mnt/vagabond/nomad
Now create the Nomad job file:
nano adguard.0.107.43.nomad
Write the following content and save the file:
job "adguard" {
  datacenters = ["dc1"]
  constraint {
    operator = "distinct_hosts"
    value = "true"
  }
  group "adguard" {
    count = 1
    network {
      mode = "bridge"
      port "dns" {
        static = 53
        to     = 53
      }
      port "gui" {
        to     = 3000
      }
    }
    service {
      name = "adguard"
      port = "gui"
      provider = "consul"
      tags = [
        "traefik.enable=true",
        "traefik.http.routers.adguard-http.entrypoints=web",
        "traefik.http.routers.adguard-http.rule=Host(`adguard.home.digitaldann.net`)",
        "traefik.http.routers.adguard-http.middlewares=adguard-https",
        "traefik.http.middlewares.adguard-https.redirectscheme.scheme=https",
        "traefik.http.routers.adguard.entrypoints=websecure",
        "traefik.http.routers.adguard.rule=Host(`adguard.home.digitaldann.net`)",
        "traefik.http.routers.adguard.tls=true"
      ]
    }
    task "adguard" {
      driver = "docker"
      config {
        image = "registry.home.digitaldann.net:8443/adguard:0.107.43"
        ports = ["dns", "gui"]
        volumes = [
          "/mnt/vagabond/docker/adguard/conf:/opt/adguardhome/conf",
          "/mnt/vagabond/docker/adguard/work:/opt/adguardhome/work"
        ]
      }
    }
  }
}
Deploy the Nomad job
Deploy Adguard on a single node (as defined by the job property ‘count’):
cd /mnt/vagabond/nomad
nomad job run adguard.0.107.43.nomad
You should see output that looks like:
==> 2023-12-21T01:47:34Z: Monitoring evaluation "7e6d80f6"
    2023-12-21T01:47:34Z: Evaluation triggered by job "adguard"
    2023-12-21T01:47:35Z: Evaluation within deployment: "c13539c4"
    2023-12-21T01:47:35Z: Allocation "0127c059" created: node "4b37faff", group "adguard"
    2023-12-21T01:47:35Z: Allocation "050c601e" created: node "32d39aab", group "adguard"
    2023-12-21T01:47:35Z: Allocation "d30a6a7e" created: node "f7d98ba8", group "adguard"
    2023-12-21T01:47:35Z: Evaluation status changed: "pending" -> "complete"
==> 2023-12-21T01:47:35Z: Evaluation "7e6d80f6" finished with status "complete"
==> 2023-12-21T01:47:35Z: Monitoring deployment "c13539c4"
  ✓ Deployment "c13539c4" successful

    2023-12-21T01:47:51Z
    ID          = c13539c4
    Job ID      = adguard
    Job Version = 0
    Status      = successful
    Description = Deployment completed successfully

    Deployed
    Task Group  Desired  Placed  Healthy  Unhealthy  Progress Deadline
    adguard     1        1       1        0          2023-12-21T01:57:49Z
Validate registration with Consul
You will want to validate that the Adguard service registered with Consul. Consul has it’s own DNS service (running on port 8600), and querying <service-name>.service.consul should resolve to the address of the node running the service.
dig adguard.service.consul @localhost -p 8600
You should see:
; <<>> DiG 9.18.18-0ubuntu0.22.04.1-Ubuntu <<>> adguard.service.consul @localhost -p 8600
;; global options: +cmd
;; Got answer:
;; ->>HEADER<<- opcode: QUERY, status: NOERROR, id: 28303
;; flags: qr aa rd; QUERY: 1, ANSWER: 3, AUTHORITY: 0, ADDITIONAL: 1
;; WARNING: recursion requested but not available

;; OPT PSEUDOSECTION:
; EDNS: version: 0, flags:; udp: 1232
;; QUESTION SECTION:
;adguard.service.consul.		IN	A

;; ANSWER SECTION:
adguard.service.consul.	0	IN	A	10.0.3.112

;; Query time: 23 msec
;; SERVER: 127.0.0.1#8600(localhost) (UDP)
;; WHEN: Thu Dec 21 01:48:18 UTC 2023
;; MSG SIZE  rcvd: 99
In this case, Nomad chose to deploy adguard to node2. There is a way to define in the nomad job which node to constrain the deployment to, but we don’t need to do that. This solution doesn’t care which node runs any service.
Configuring Adguard
In the Adguard job, there are two ports defined: ‘dns’ and ‘gui’. The ‘dns’ port opens port 53 on the host and maps it to port 53 on the container. The ‘gui’ port only defines a mapping to port 3000 on the container, so what port does Nomad map to it from the host? The answer is that Nomad maps a random dynamic port from the host when one isn’t defined. This dynamic port is registered in the Consul service catalog, and that is what Traefik uses to determine where to send reverse proxy traffic.
However, local DNS needs to be in place to lookup local domain names. Adguard will provide that DNS service, but until it is configured there is no way to resolve the ‘adguard.home.digitaldann.net’ domain name to the Adguard service endpoint.
To get Adguard configured, one will have to connect directly to the node running Adguard via the dynamic port. This dynamic port configuration can be found in the Nomad UI. Open a new browser from any computer that can reach the cluster and browse to the Nomad web console (use your own cluster IP):
http://10.0.3.111:4646
You will see the Nomad UI:
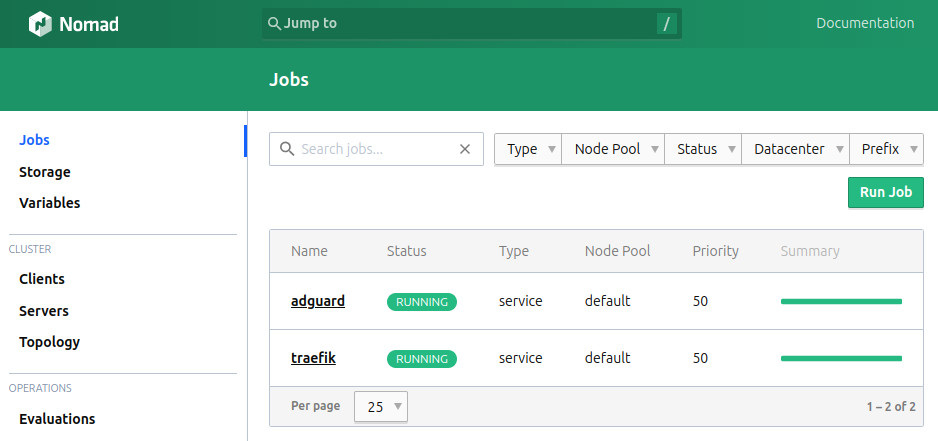
Click on the ‘adguard’ job.
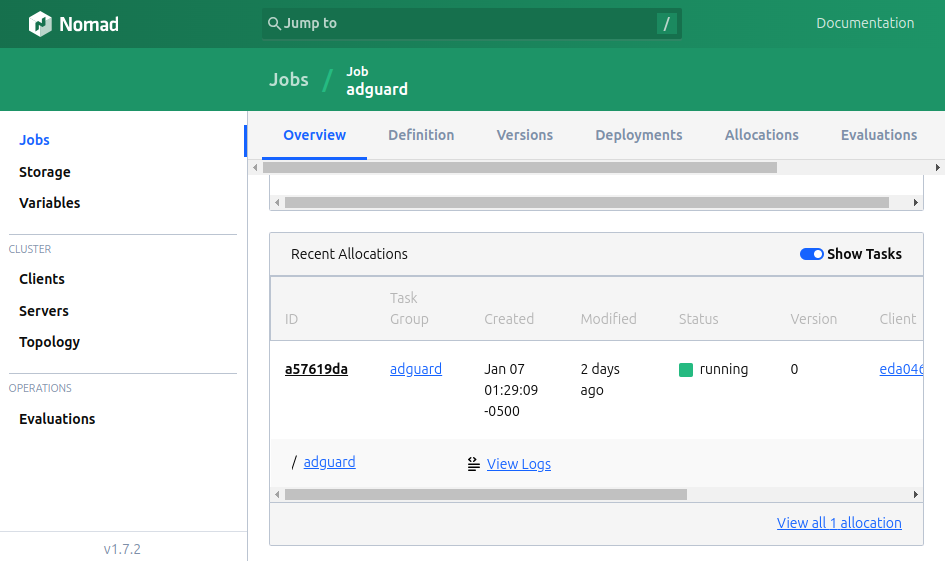
Under Recent Allocations, click on the Allocation ID (’78c89ff7′ in the example above).

Under Ports, you will see both the node address and dynamic host port mapped to port 3000 on the container (in the example above, it is ‘10.0.3.112:23530’). Armed with that knowledge, you can open the Adguard web console to configure it (use your own IP/port):
http://10.0.3.112:23530/
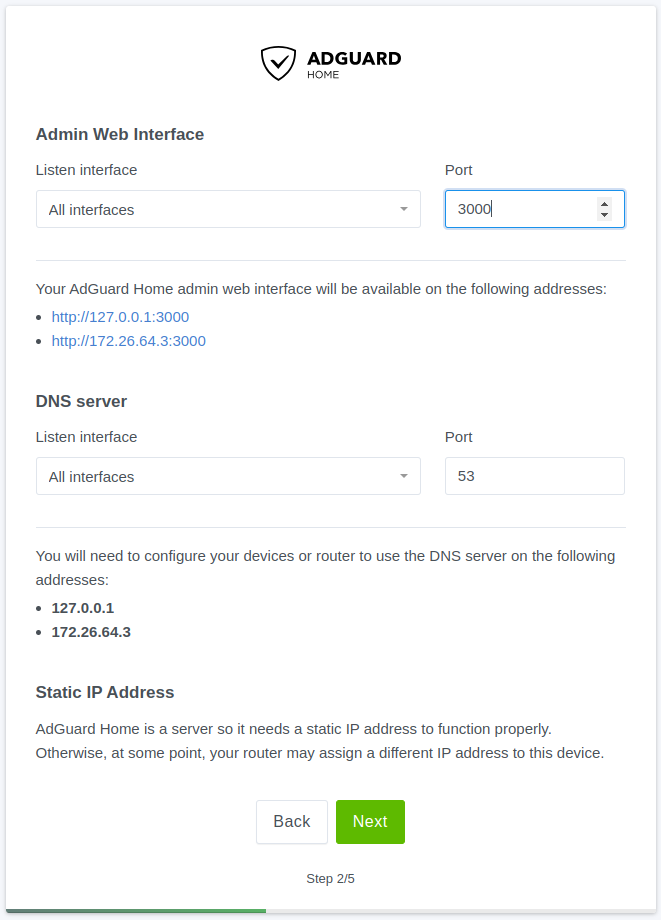
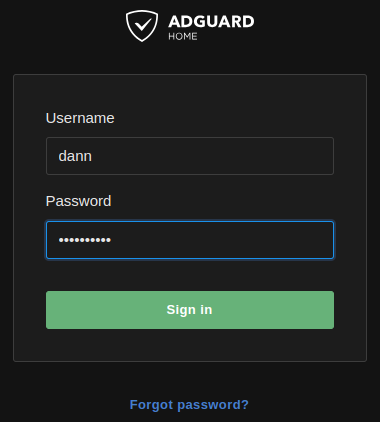
You should see:

Step through the configuration wizard and keep all the defaults on Step 2/5 except for the Admin Web Interface. Change the port from 80 to 3000.
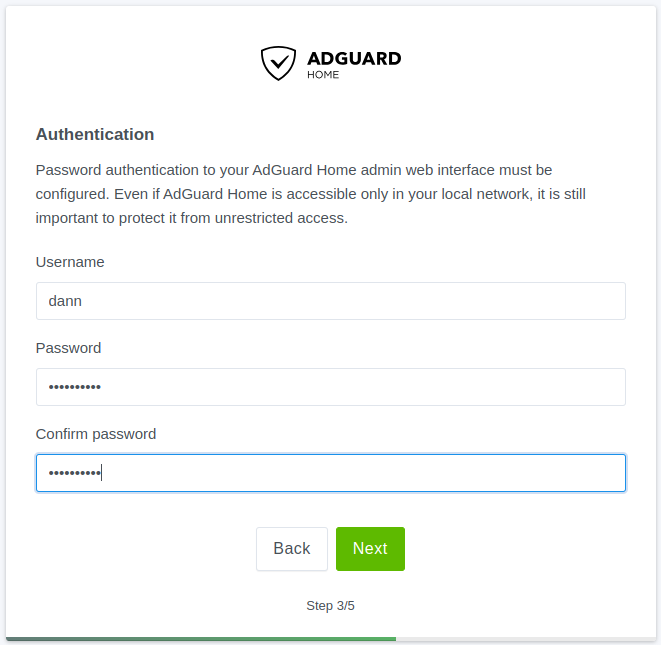
In the next step, configure your username and password.
Complete the last two configuration steps that require no input. You will be redirected to the the IP address on port 3000, which will not work. Just reload the link above (IP address and dynamic port) to get to the Adguard web console login. Log in with the username and password you configured.
In the Adguard web console, select the ‘Settings’ menu (top) and from that select ‘DNS Settings’. Under the ‘Upstream DNS Servers’, append this line to the list:
[/service.consul/]169.254.254.254:8600
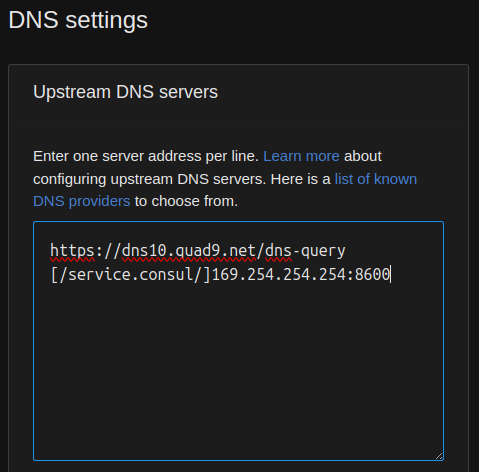
Click ‘Test upstreams’ to validate the configuration is working, and then ‘Apply’ to save the configuration.
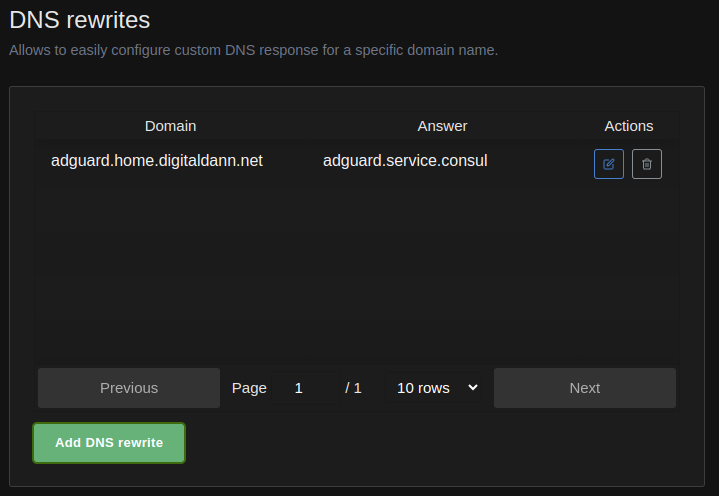
From the ‘Filters’ menu (top) select ‘DNS rewrites’. This is where you will add your DNS entries. Click ‘Add DNS rewrite’ (green button). Here you will enter a domain name entry and a record of either an IP address (A record) or another domain name (CNAME record). Add the domain name ‘adguard.home.digitaldann.net’ and a record of ‘adguard.service.consul’.

Click ‘Save’.
Now you can query the Adguard DNS to see the resolution of the new domain name (replace IP with the address of your node running Adguard):
dig adguard.home.digitaldann.net @10.0.3.112
You should see:
; <<>> DiG 9.18.18-0ubuntu0.22.04.1-Ubuntu <<>> adguard.home.digitaldann.net @10.0.3.112
;; global options: +cmd
;; Got answer:
;; ->>HEADER<<- opcode: QUERY, status: NOERROR, id: 41228
;; flags: qr aa rd; QUERY: 1, ANSWER: 2, AUTHORITY: 0, ADDITIONAL: 1
;; WARNING: recursion requested but not available

;; OPT PSEUDOSECTION:
; EDNS: version: 0, flags:; udp: 1232
;; QUESTION SECTION:
;adguard.home.digitaldann.net.	IN	A

;; ANSWER SECTION:
adguard.home.digitaldann.net. 10 IN	CNAME	adguard.service.consul.
adguard.service.consul.	0	IN	A	10.0.3.112

;; Query time: 4 msec
;; SERVER: 10.0.3.112#53(10.0.3.112) (UDP)
;; WHEN: Sun Jan 07 07:39:26 UTC 2024
;; MSG SIZE  rcvd: 109
What has happened here?
Adguard has been deployed via Nomad and the service has been registered with Consul. Consul resolves the DNS query ‘adguard.service.consul’ to the specific node hosting Adguard. Adguard has been configured to forward queries of the ‘.service.consul’ domain to the Consul DNS. A domain has been added to Adguard of ‘adguard.home.digitaldann.net’ which redirects to ‘adguard.service.consul.
Any time a query is made to Adguard for ‘adguard.home.digitaldann.net’, the result will be the IP address of the node hosting Adguard. If Adguard gets deployed to a different node for any reason, its registration in Consul will be updated to reflect the new node. As a result of this configuration, queries for ‘adguard.home.digitaldann.net’ will always resolve to the current IP of Adguard.
In addition, when any browser requests for the domain ‘adguard.home.digitaldann.net’ are sent to Traefik, it will query Consul to find the registered application for that domain. Traefik will find the IP address and dynamic port and the proxy traffic (with TLS termination) to that container endpoint.
Additional DNS records to add: Repeat the above steps to add DNS Rewrites for these records:
– ‘dashboard.home.digitaldann.net’ -> ‘dashboard.service.consul’
– ‘health.check’ -> ‘169.254.254.254’
– ‘registry.home.digitaldann.net’ -> ‘169.254.254.254’
Wrapping Up
Now that Traefik and Adguard are setup and configured, the next step will be to configure the cluster to use the Adguard DNS and optionally to configure the entire network to use the Adguard DNS. That’s coming next!