Introduction
Nomad (by Hashicorp) is ‘a simple and flexible scheduler and orchestrator for managing containers and non-containerized applications across on-prem and clouds at scale’. This is perfect for us as our home networks are essentially a ‘private cloud’. Many may ask: Why use Nomad? Kubernetes does it all! That’s right, Kubernetes does do it all… and it comes with everything you need and everything you don’t need, even if you don’t want it. The learning curve for Nomad is much lower than for Kubernetes, plus Nomad leverages Docker for container management by default. This means your Docker skills are not going to go to waste. Let’s dive into it!
Environment
For the sake of this guide, assume there are three cluster nodes with addressing such as:
node1 - 10.0.3.101
node2 - 10.0.3.102
node3 - 10.0.3.103
Performing actions as root
The ideal security model dictates that interactively operating as root is incorrect, and that operations should run as a user, using ‘sudo’ to elevate permissions where necessary. Unfortunately, almost everything that needs to be done here will require ‘sudo’, so it will be faster to just become root and run everything as root:
sudo su -
Perform the following steps on each node until instructed otherwise
Install Nomad
Install the Nomad service by running the following:
apt install nomad -y
Download the Nomad configuration playbook:
wget https://raw.githubusercontent.com/digital-dann/nomad-cluster/main/configure-nomad.yaml
Edit the ‘configure-nomad.yaml’:
nano configure-nomad.yaml
Update the ‘Set Parameters’ section:
- name: Set Parameters
  set_fact:
    datacenter: 'dc1'
    cluster_ips:
      - '10.0.3.101'
      - '10.0.3.102'
      - '10.0.3.103'
The ‘datacenter’ value is used to group nodes in geographic locations. You can name the datacenter whatever you want but it should be consistent across all your nodes (unless you setup another cluster in a different location).
The ‘cluster_ips’ list should contain all your node addresses.
Once you have updated the ‘configure-nomad.yaml’ file, you should execute it:
ansible-playbook configure-nomad.yaml
Start the nomad service by running the following:
systemctl enable nomad.service
systemctl start nomad.service
Install CNI Plugins
Download the Container Networking Interface (CNI) plugins:
cd /tmp
curl -L -o cni-plugins.tgz "https://github.com/containernetworking/plugins/releases/download/v1.0.0/cni-plugins-linux-$( [ $(uname -m) = aarch64 ] && echo arm64 || echo amd64)"-v1.0.0.tgz
mkdir -p /opt/cni/bin
tar -C /opt/cni/bin -xzf cni-plugins.tgz
Set the configuration to route container traffic through the bridge network:
echo 1 | sudo tee /proc/sys/net/bridge/bridge-nf-call-arptables
echo 1 | sudo tee /proc/sys/net/bridge/bridge-nf-call-ip6tables
echo 1 | sudo tee /proc/sys/net/bridge/bridge-nf-call-iptables
Create the config file to set this configuration on reboot:
cat << EOF > /etc/sysctl.d/bridge.conf
net.bridge.bridge-nf-call-arptables = 1
net.bridge.bridge-nf-call-ip6tables = 1
net.bridge.bridge-nf-call-iptables = 1
EOF
Validate Installation
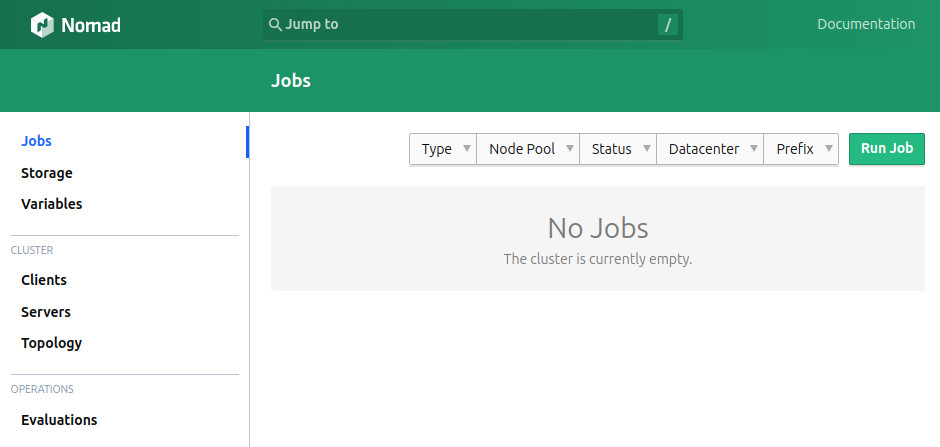
To validate Nomad is running, you can open a browser to (substitute your own IP address):
http://10.0.3.101:4646/
You should see a page that looks similar to:
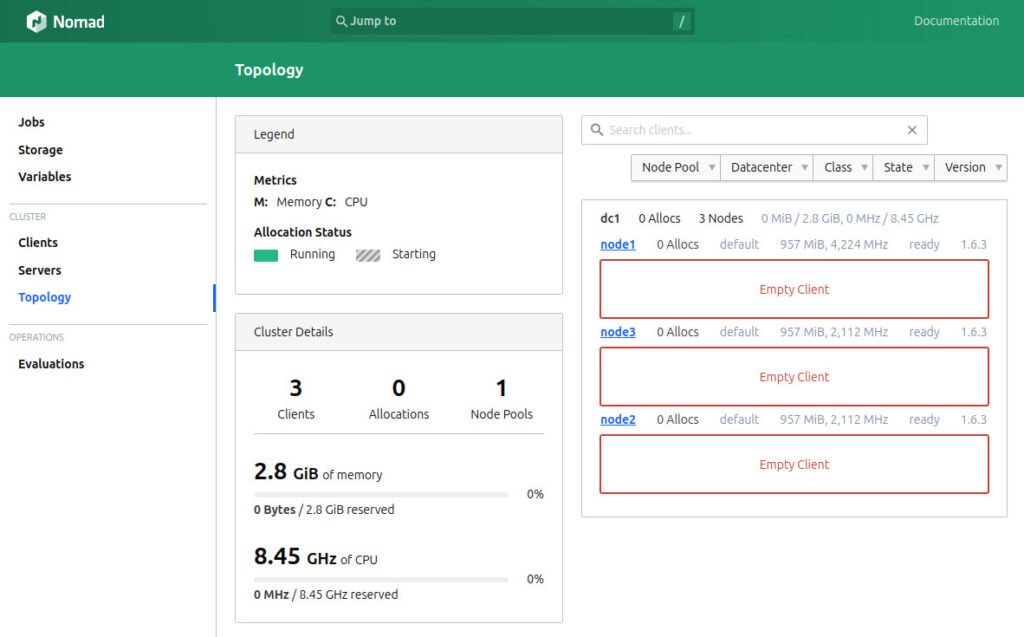
Click on ‘Topology’ on the left and you should see all your nodes:
Nomad and Security
In this very basic configuration, there is no TLS encryption configured for Nomad server/server or client/server network traffic. It is best practice to set that up, but for expediency and simplicity this has been skipped. If you want to setup TLS encryption now or come back to it later, the following details the steps.
Configure TLS Security for Nomad
TBD, Sorry.
Conclusion
That’s it! Move on to the next part.