Introduction
The Intel Active Management Technology is “is hardware and firmware for remote out-of-band management of select business computers, running on the Intel Management Engine”. In plainer terms, it means that your HP EliteDesk Mini has a remote management feature built into the motherboard which allows you to, among other things, connect with a virtual KVM. This KVM interface is running even when the computer is plugged in, as long as it is connected to power. This guide will demonstrate how to configure it.
Getting into the BIOS
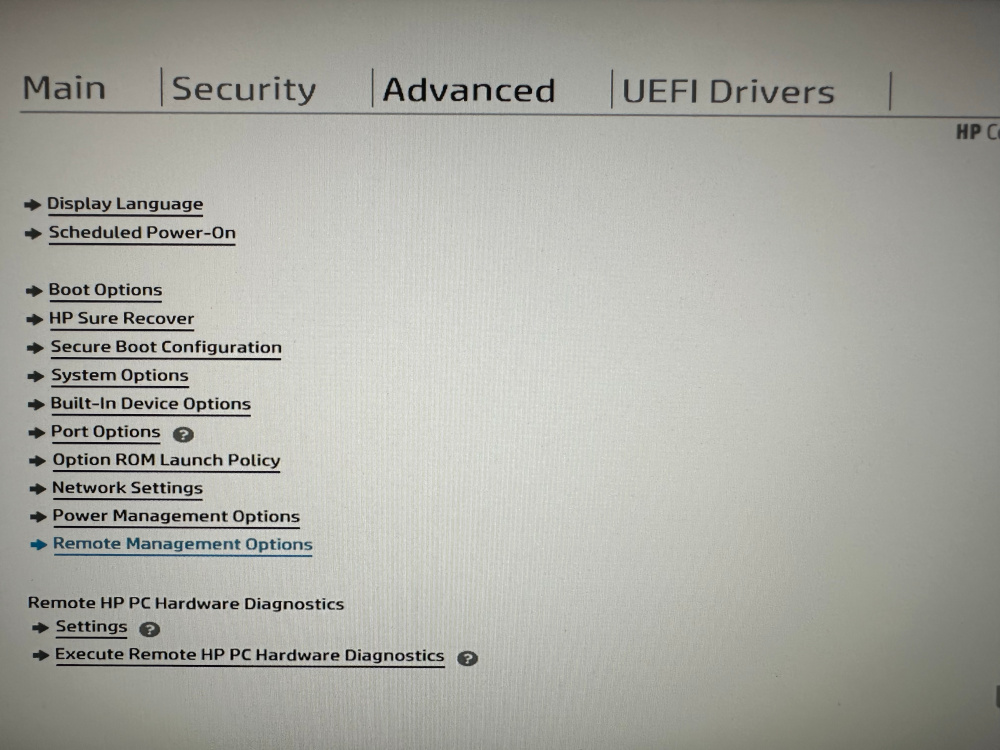
To reset the Management Engine configuration and allow you to configure it to your preferences, you will need to reboot the machine and press F10 (repeatedly) to bring up the BIOS Menu. Once in the BIOS menu, either click on (with a mouse) or nagivate with arrow keys to and press Enter on ‘Advanced’ (top menu bar option), then ‘Remote Management Options’:
Then change the setting for ‘Unconfigure AMT on next boot’ to ‘Apply’:

Exit BIOS (saving the new settings). The machine will reboot. When it does, you will be prompted to unconfigure the AMT. Press ‘Y’:

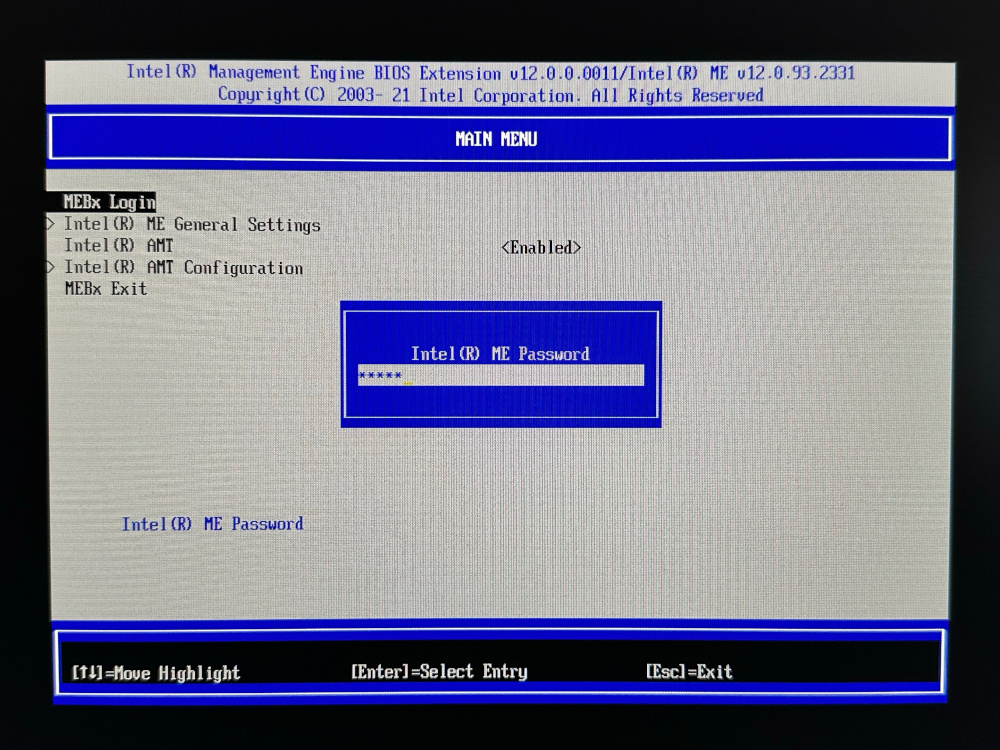
Your machine will restart. Press F6 during the reboot sequence (it may take a while) to load the Management Engine configuration. Press ‘Enter’ to login to the MEBx. Enter the default password of ‘admin’:
Now choose a new password for remote access. There are some requirements that are not displayed:
– At least 8 characters
– One special character
– One number
– One capital letter
– One small letter
Example: ‘P@ssword1’
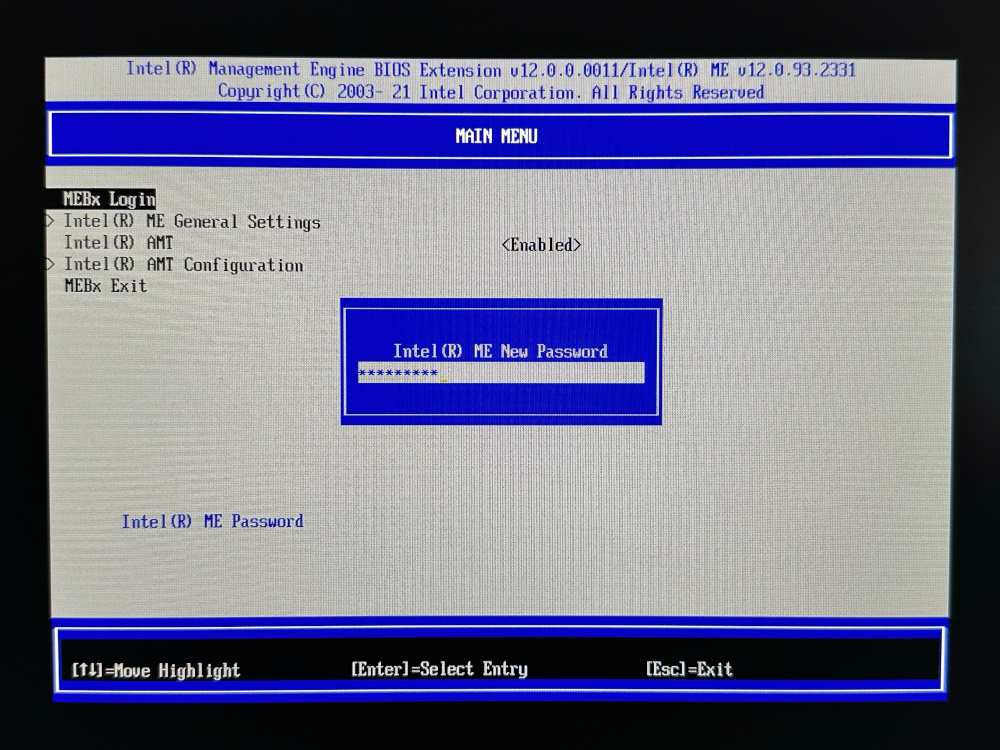
Confirm the password:

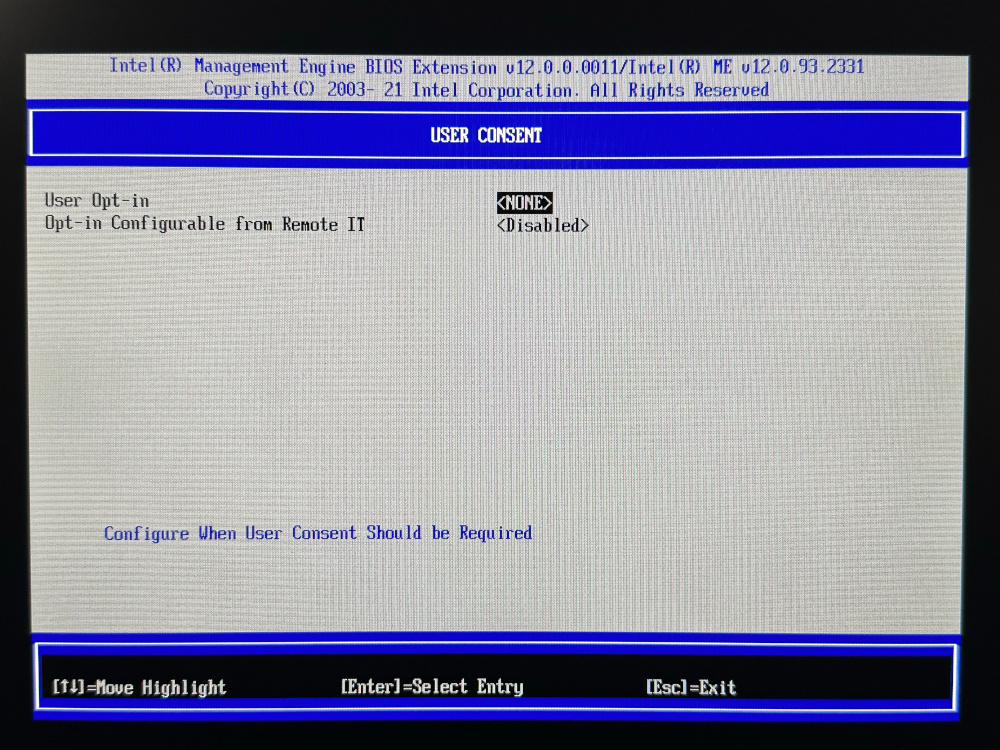
Once logged in, use the arrow keys to navigate to and press ‘Enter’ on ‘Intel(R) AMT Configuration’. Then nagivate to and press ‘Enter’ on ‘User Consent’. Press ‘Enter’ to select ‘User Opt-in’ and set the value to ‘None’. Then press ‘ESC’ to return to the previous menu.
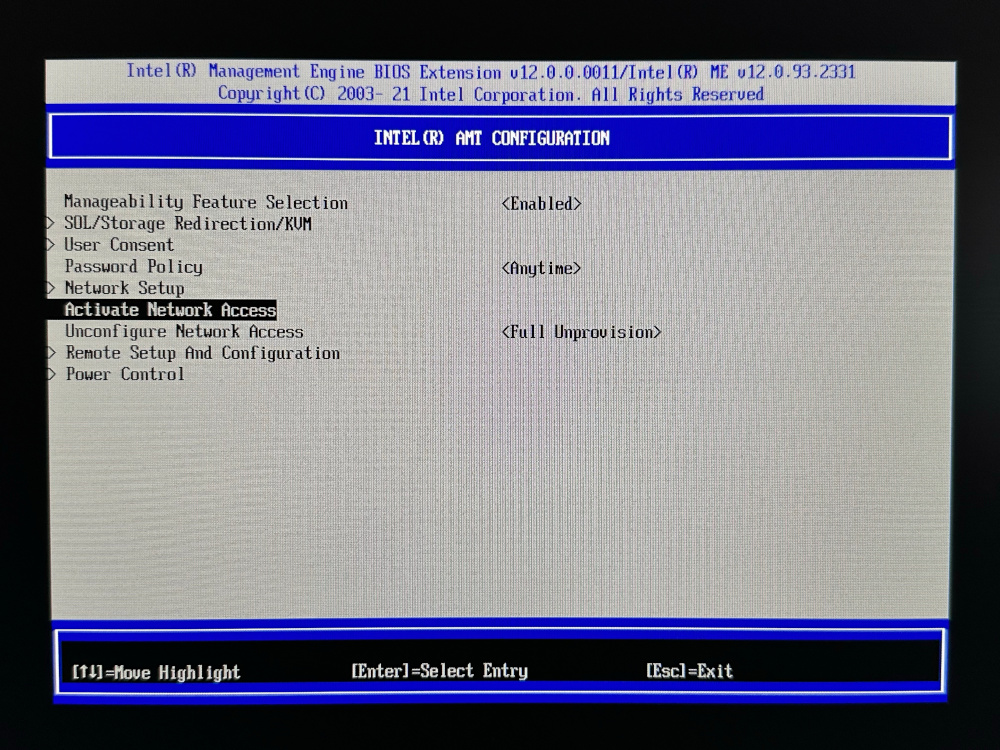
Use the arrow keys to navigate to and press ‘Enter’ on ‘Intel(R) AMT Configuration’. Then navigate to and press ‘Enter’ on ‘Activate Network Access’.
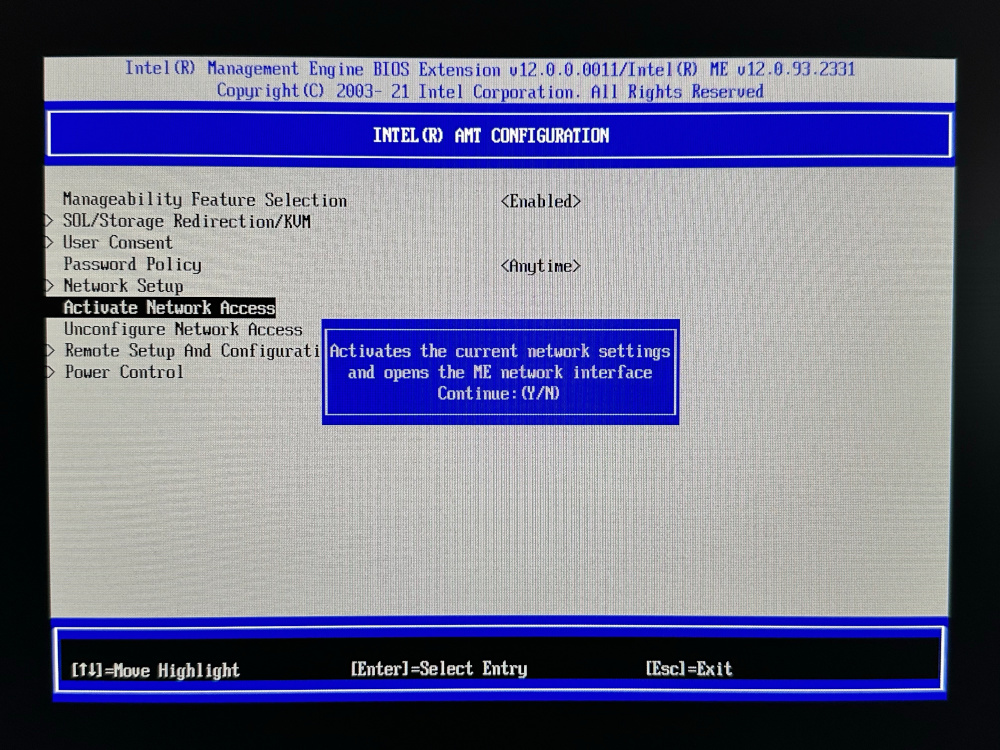
Press ‘Y’ to confirm activation of Network Access:
Nagivate to and press ‘Enter’ on ‘Network Setup’. Then navigate to and press ‘Enter’ on ‘TCP/IP Settings’:
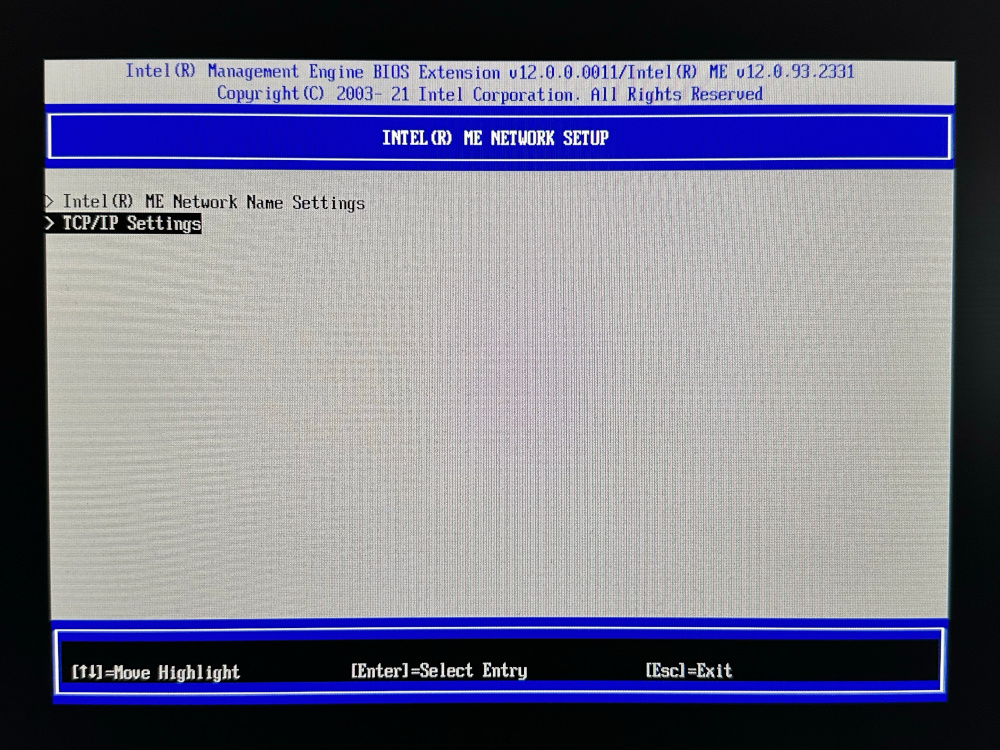
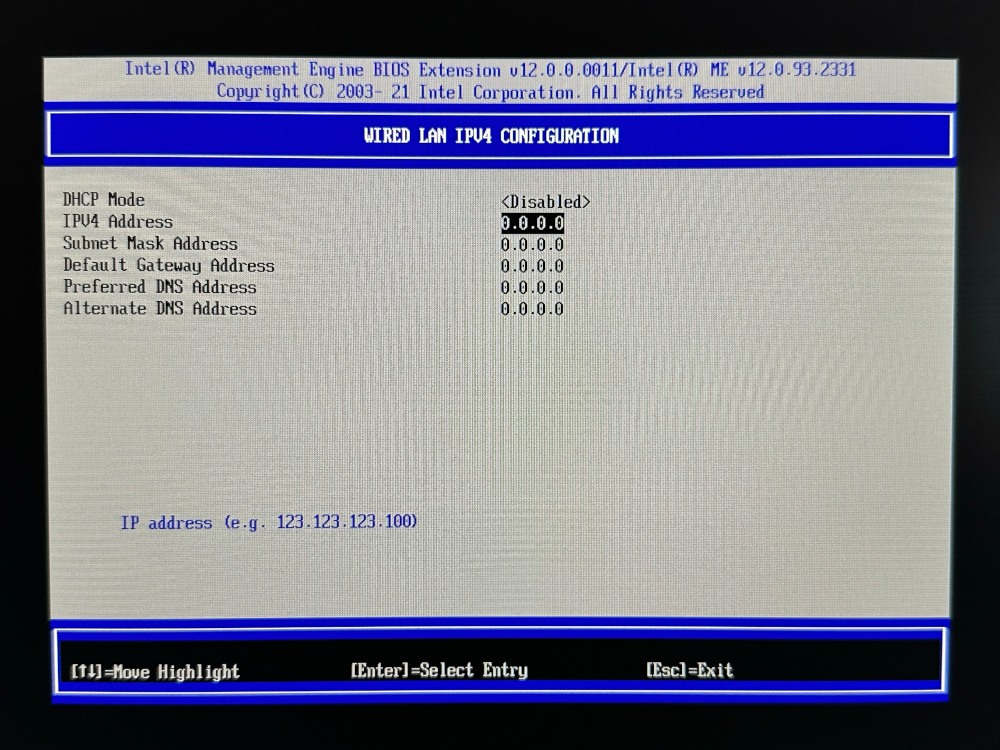
Nagivate to and press ‘Enter’ on ‘Wired LAN IPV4 Configuration’:

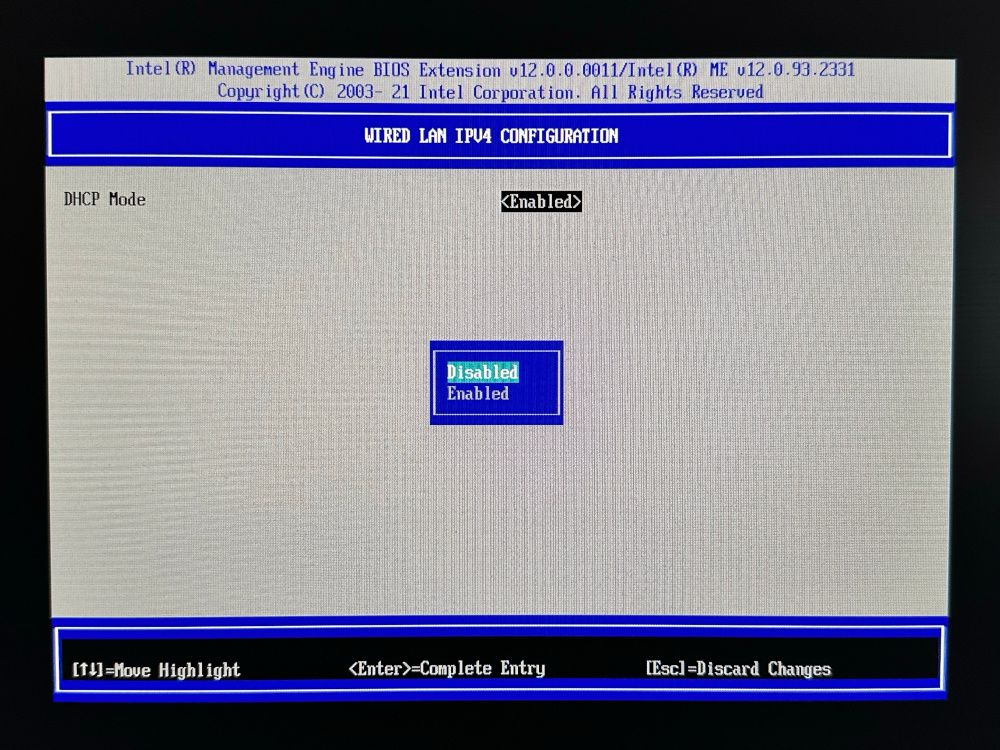
Press enter on ‘DHCP Mode’ and change it (up/down arrow keys) to ‘Enabled’ and press ‘Enter’:
Use arrow keys to navigate through the settings to configure the network address of the AMT. You can use the same IP address that the operating system is configure for (that’s what I do, I find it simpler).
Once configured, just press ‘ESC’ to reverse your way back up the menu chain to the top menu. Pressing ‘ESC’ there will prompt to exit the ME configuration system. There will be no prompt to save the settings, they are already saved.
Connect a ‘monitor’
You will need to attach a dummy DisplayPort plug to one of the connectors on the back of the machine. This will fool the AMT into thinking a monitor is connected. You will not be able to KVM into the machine without a monitor connected.
Conclusion
That’s it! In a later guide you will setup MeshCommander which will let you connect to the built in virtual KVM.